
GREEN ENOUGH: Eat Better, Live Cleaner, Be Happier (All Without Driving Your Family Crazy!)
Leah Segedie
Rodale
March 20, 2018
$22.99/Hardcover
ISBN-13: 978-1623367602
Leah Segedie
Rodale
March 20, 2018
$22.99/Hardcover
ISBN-13: 978-1623367602
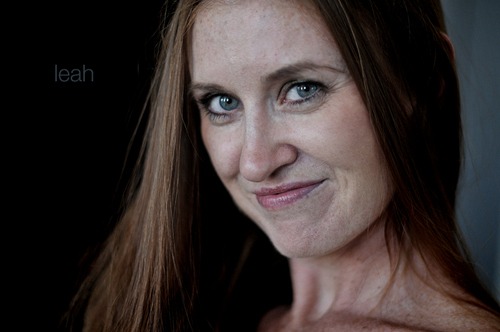
Leah Segedie is the creator of Mamavation.com and CEO of eco-wellness conference ShiftCon. She has spent the last decade uncovering the deceptive marketing and fallacious propaganda embedded in our everyday lives from corporations and the food industry. Through her blog, thousands of moms have detoxified their lives and the lives of their children. She lives with her family in Southern California.
What’s really in that cleaning spray? Those tortilla chips? That deodorant? Brace yourself- in GREEN ENOUGH, Mamavation blogger Leah Segedie uncovers the truth behind the food and household products that are filled with synthetic chemicals and toxins. From furniture to packaged food, Leah empowers you to detoxify your home, diet, and lifestyle, guiding you toward making clean choices. It’s not about being perfect – none of us are – it’s about being green enough. In this book, she…
Makes about 5 cups cooked beans
This recipe yields a substantial amount of cooked beans and soup- ready broth, setting you up to make an assortment of tasty meals. I like to use some of the beans right away, stash another recipe’s worth (plus plenty of liquid to cover) in the fridge to make something else later in the week, and bank the rest of the beans and liquid in the freezer. See below for the estimated cooking times for the types of beans used in this book.
Set a soup pot or other large, deep, heavy-bottomed pot over medium- low heat; add the butter, stir in the chopped vegetables, season generously with salt and pepper, and cook, stirring occasionally, until the onions are soft and translucent, about 10 minutes.
Meanwhile, put the beans in a strainer or colander large enough that you can spread them out, so that while you’re rinsing them under cold running water you can paw through and pick out any teeny rocks or funky-looking beans.
Dump the clean beans into the pot along with the bay leaf, garlic, and herbs, and add lukewarm water to a depth of several inches above the Bring to a boil over medium-high heat and continue to boil for 15 minutes, then lower the heat to a simmer.
Continue cooking the beans at a gentle but steady simmer, occasion- ally skimming off and discarding any foam that forms on the sur- face, for 30 to 40 minutes, just until the beans begin to go from hard to a bit tender (for garbanzos and other beans on the larger and/or older side, this can take an hour or so). Add the
Continue cooking until the beans are tender but not soft; see below for estimated cooking times for the beans used in the recipes in this Taste and adjust seasoning with additional salt if needed.
The estimated cooking times listed below should work for varieties of beans that are similar sizes and shapes. But always remember that times can range very widely, so start checking sooner than you think you need to and use a timer throughout the whole process so you don’t space out and end up with mushy beans instead of gorgeously tender ones.
Black beans: 45 to 60 minutes Cannellini beans: 1 to 11/2 hours
Garbanzo beans (chickpeas): 11/4 to 2 hours
BANK
FRIDGE: Store the beans in an airtight container (along with enough cooking liquid to cover or they’ll dry out), for up to a week; additional broth can also be kept in jars in the fridge for up to five days, or frozen.
FREEZER: Separate the beans from the cooking liquid (don’t pour it down the drain!); store in airtight 1- or 2-cup containers or freezer bags (press all air out before sealing) and freeze for up to three months. Fish out and discard the bay leaf, garlic cloves, and herb stems, trans- fer the broth to tempered glass containers, and freeze for up to three months.
Yield: 1 cup dry quinoa makes about 2 cups cooked Cook time: about 25 to 30 minutes total
(5 to 10 minutes to toast, 15 to 20 to cook)
This grain-like seed comes in lots of colors—most commonly blonde, red, and black—each of which has its own subtly unique flavor, and a rainbow combo can be a fun way to go. Whatever the shade, all quinoa is packed with protein—a legit superfood—but please take my word for it when I tell you quinoa is a lot tastier (no bitterness, lots of nuttiness) if you bother to rinse it first and then toast it.
PREP
Even if the package indicates the quinoa is ready to cook, get those grains into a (very) fine-mesh strainer and rinse thoroughly under run- ning water, shaking the strainer to make sure they all get a good washing (each teeny little seed has a natural, bitter-tasting coating that clings tenaciously).
Then toast: If you’re making 1 cup or less, transfer the rinsed quinoa to a dry, medium-size, heavy-bottomed saucepan and toast gently, stir- ring often, over low heat, 5 to 10 minutes or until it has dried, darkened slightly (if it started out light-colored), and gives off a nutty aroma. If you’re cooking more than 1 cup, spread the washed quinoa on a parchment-lined, rimmed baking sheet and bake at 350°F for 5 or 10 minutes, stirring a few times. Either way, keep a close eye on your quinoa so it doesn’t overbrown and go bitter.
COOK
If you’re starting with 1 cup or less, then leave the quinoa in the pan you just toasted it in and add water or broth to the saucepan at a straight 2:1 ratio of liquid to quinoa. Broth will get you more flavor, but water’s also fine (just be sure to add a generous pinch or two of salt). Bring to a boil over high heat, then immediately lower the heat to a simmer, cover, and cook until the liquid is absorbed and the squiggly little tails have sprung loose, 15 to 20 minutes. Fluff with a fork.
For larger amounts, cook just as you would pasta: Bring a big pot of generously salted water to boil (optional, but nice: add flavor by tossing in a bay leaf and or branches of a sturdy fresh herb like thyme or rosemary, and or onion/shallot/leek, carrot/celery). Use the parchment lining the pan to funnel the toasted quinoa into the pot for cooking. (Put the parchment back on the baking sheet; you’ll be using it again.) Start checking for doneness (little tails sprung loose) after 10 to 12 minutes— quinoa cooks even faster this way than it does the lid-on way. Drain well using a fine-mesh strainer, removing and discarding any veggies or herbs. Transfer back to the baking sheet, spreading out evenly, then put the pan in the fridge and let the quinoa dry and chill, uncovered, before using or storing (this step prevents the grainlike seeds from going gummy).
Bank
Cooked quinoa keeps well in an airtight container in the fridge for several days. To freeze, portion out fluffed, cooled quinoa into clearly labeled 1- or 2-cup containers or freezer bags.
These recipes may be reproduced with the following credit:
Recipes from GREEN ENOUGH: Eat Better, Live Cleaner, Be Happier (All Without Driving Your Family Crazy!) by Leah Segedie. (Rodale; March 20, 2018; $22.99/Hardcover, ISBN-13: 978-1623367602).
Contact: Maya Lane
212-782-9164
malane@penguinrandomhouse.com